
I made my Next.js app print a real receipt
My Next.js app could charge a card, email a confirmation, and update inventory. It could not put a piece of paper in somebody's hand.
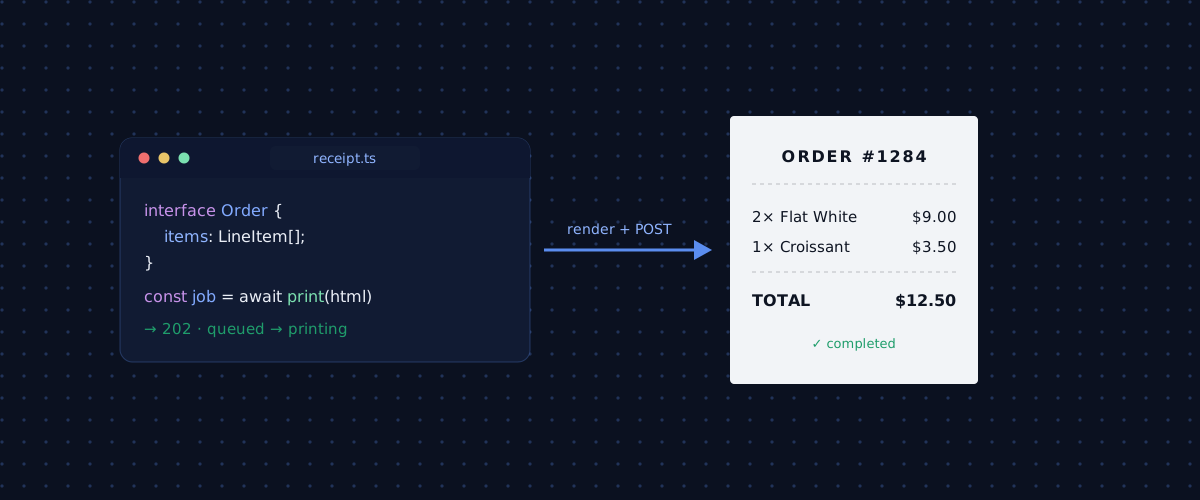
My Next.js app could charge a card, email a confirmation, and update inventory. It could not put a piece of paper in somebody's hand.
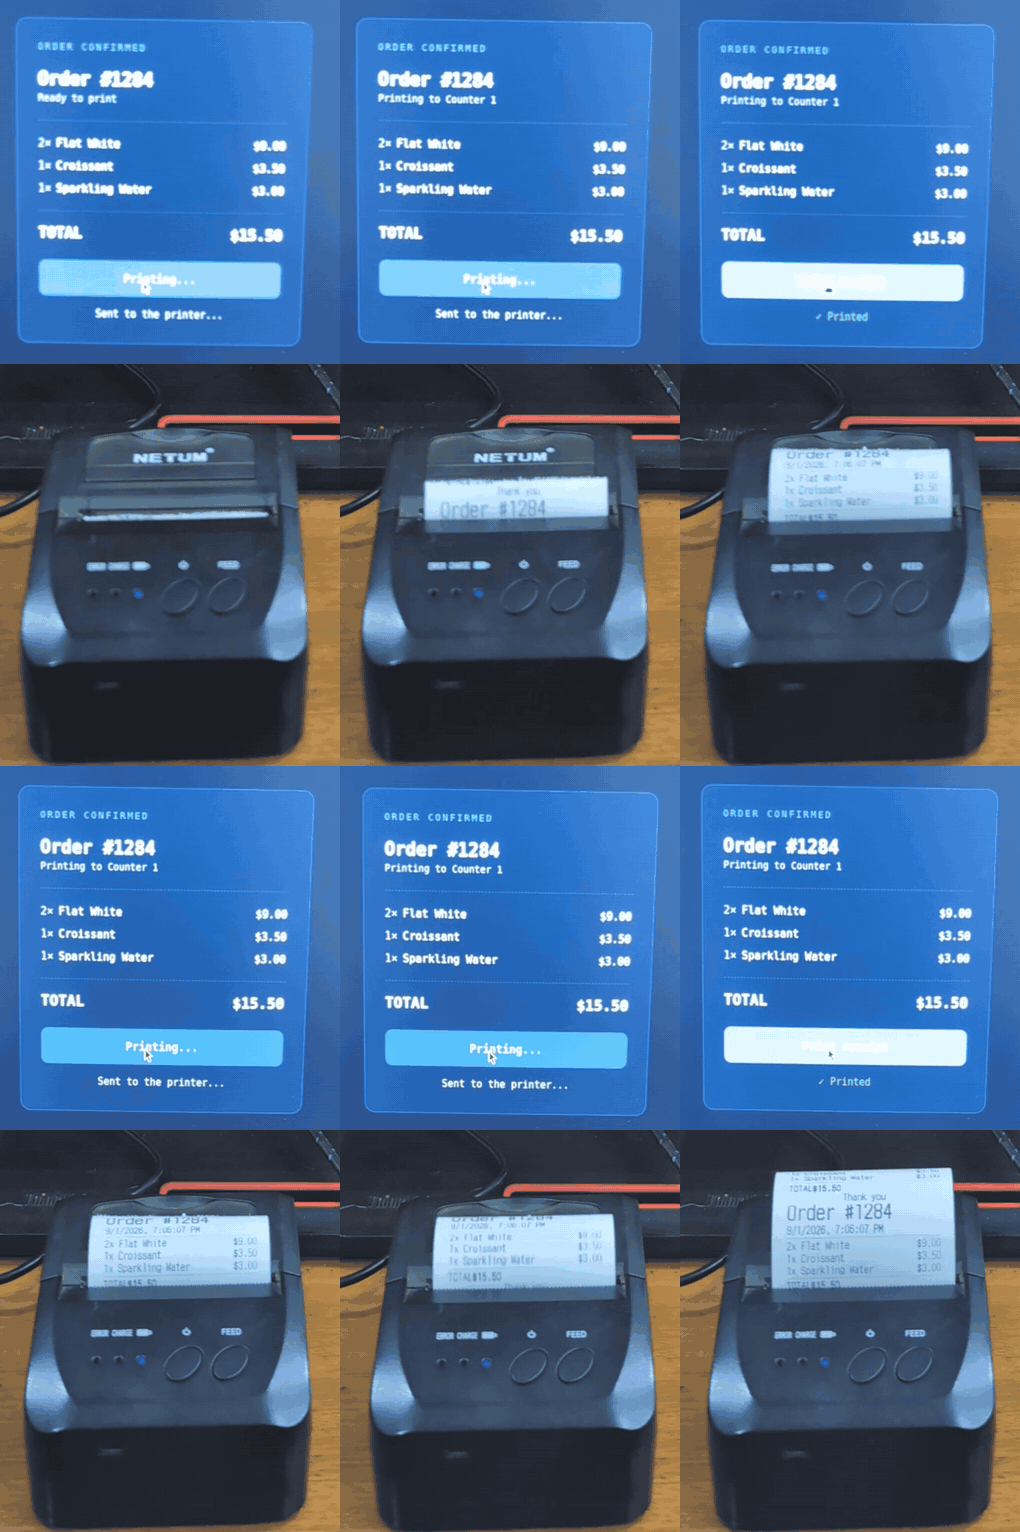
That is a real thermal printer on a real counter, and this is the entire integration:
await fetch(`https://api.receiptful.io/v1/printers/${printerId}/jobs`, {
  method: "POST",
  headers: {
    Authorization: `Bearer ${process.env.RECEIPTFUL_API_KEY}`,
    "Content-Type": "text/html",
  },
  body: `<h1>Order #1284</h1><p>Total: $18.40</p>`,
});
One fetch. No print server, no drivers, no SDK, and no ESC/POS bytes assembled by hand.
The rest of this post is getting from that snippet to a receipt you would actually hand a customer: the layout rules that matter, how to know it really printed, and what to do when the printer is switched off.
Why you cannot just print
Briefly, because you have probably already hit it. Browsers cannot cut paper or open a cash drawer. WebUSB needs a user gesture, HTTPS, a Chromium browser, and the printer cabled to that exact machine, and Bluetooth printers are out entirely. Your server cannot reach the printer either, because it is behind somebody else's router speaking a protocol from the 1990s.
So something local has to talk to the printer, and your backend has to reach that local thing. Everything below is wiring.
What you need before the code
- A thermal printer. Mine is a 58mm Bluetooth one that cost about $40.
- An Android phone or tablet near it, running the Receiptful app, paired once. This is the local piece. A retired phone in a drawer is fine.
- An API key from the console. It looks like
rf_followed by 64 hex characters and is shown once.
Setup takes a couple of minutes and the getting started guide has screenshots of every screen, so I am not repeating it here.
# .env.local
RECEIPTFUL_API_KEY=rf_3f9c...
That is the only thing you configure. The app will find the printer itself, which is the next step.
Step 1: the order
Your orders have more fields than this. This is enough to print something useful:
// lib/types.ts
export interface LineItem {
  name: string;
  quantity: number;
  unitPriceCents: number;
}

export interface Order {
  id: number;
  items: LineItem[];
  placedAt: Date;
}
Money in cents, formatted only at the edge. A receipt total that is one cent off because of float arithmetic is a bug a customer notices immediately and you never do.
Step 2: the receipt, as HTML
This is the part I expected to be miserable and was not. You send HTML and it gets rendered to ESC/POS for your specific printer model, so you lay out a receipt with tags you already know instead of assembling byte codes.
// lib/receipt.ts
import type { Order } from "./types";

const money = (cents: number) => "$" + (cents / 100).toFixed(2);

export function renderReceipt(order: Order): string {
  const total = order.items.reduce(
    (sum, i) => sum + i.quantity * i.unitPriceCents,
    0,
  );

  const rows = order.items
    .map(
      (i) => `<tr>
        <td>${i.quantity}x ${i.name}</td>
        <td align="right">${money(i.quantity * i.unitPriceCents)}</td>
      </tr>`,
    )
    .join("");

  return `
    <h1>Order #${order.id}</h1>
    <p>${order.placedAt.toLocaleString()}</p>
    <hr />
    <table width="100%">${rows}</table>
    <hr />
    <table width="100%">
      <tr><td><b>TOTAL</b></td><td align="right"><b>${money(total)}</b></td></tr>
    </table>
    <p align="center">Thank you</p>
  `;
}
One rule that matters more than any other: a 58mm roll is about 32 characters wide. Two columns is the maximum that stays readable, there is exactly one ink colour, and anything delicate turns to mush. I wrote up the full set of 58mm layout constraints separately, but "two columns, big type, no backgrounds" gets you 90% of the way.
Step 3: find the printer
Print jobs go to a specific printer, so something has to say which one. You can copy the ID out of the console, but then it is one more thing to configure, and I would rather the app just asked:
// lib/printer.ts
export const API = "https://api.receiptful.io/v1";

export async function firstReadyPrinter() {
  const res = await fetch(`${API}/printers`, {
    headers: { Authorization: `Bearer ${process.env.RECEIPTFUL_API_KEY}` },
    cache: "no-store",
  });

  const printers = await res.json();
  const ready = printers.find((p: { is_logged_in: boolean }) => p.is_logged_in);

  if (!ready) throw new Error("No printer with the app connected.");
  return { id: ready.id as number, label: ready.label as string };
}
is_logged_in is the useful bit: a printer that exists but has no app running next to it cannot print, and you want to find that out here rather than from a failed job.
Grabbing the first ready printer is a demo shortcut, and worth being honest about. A real deployment stores the printer ID next to the location it belongs to, so the till in Lyon prints in Lyon. But for getting to paper today, this removes a setup step.
Step 4: the route handler
// app/api/print/route.ts
import { NextResponse } from "next/server";
import { renderReceipt } from "@/lib/receipt";
import { API, firstReadyPrinter } from "@/lib/printer";
import type { Order } from "@/lib/types";

export async function POST(request: Request) {
  const order: Order = await request.json();
  const printer = await firstReadyPrinter();

  const res = await fetch(`${API}/printers/${printer.id}/jobs`, {
    method: "POST",
    headers: {
      Authorization: `Bearer ${process.env.RECEIPTFUL_API_KEY}`,
      "Content-Type": "text/html",
      // a receipt nobody collected in 5 minutes is not worth printing
      "X-Lifetime-Seconds": "300",
    },
    body: renderReceipt({ ...order, placedAt: new Date(order.placedAt) }),
  });

  if (!res.ok) {
    const detail = await res.text();
    console.error("print failed", res.status, detail);
    return NextResponse.json({ error: "print failed" }, { status: 502 });
  }

  const job = await res.json();
  return NextResponse.json({
    jobId: job.id,
    printerId: printer.id,
    status: job.status,
  });
}
That is the whole integration. One fetch. No SDK, no driver, no print server, no bytes.
Step 5: the screen that triggers it
The route handler will print for anything that can POST to it, but the demo in the GIF at the top is a page with one button. The part that matters is the status: you click, and the label walks from "Sent to the printer" to "Printed" while the paper is actually coming out.
// app/checkout.tsx
"use client";

import { useState } from "react";

const LABELS: Record<string, string> = {
  queued: "Sent to the printer...",
  notification_received: "Printer picked it up...",
  printing: "Printing...",
  printed: "Printed",
  expired: "The printer never came back. Job expired.",
};

export default function Checkout({ order }: { order: Order }) {
  const [status, setStatus] = useState<string | null>(null);

  async function print() {
    setStatus("queued");
    const res = await fetch("/api/print", {
      method: "POST",
      headers: { "Content-Type": "application/json" },
      body: JSON.stringify(order),
    });
    const { jobId, printerId } = await res.json();

    // poll until the job reaches a terminal state
    for (let i = 0; i < 20; i++) {
      await new Promise((r) => setTimeout(r, 1000));
      const s = await fetch(`/api/status?printerId=${printerId}&jobId=${jobId}`);
      const { status: next } = await s.json();
      setStatus(next);
      if (["printed", "failed", "expired"].includes(next)) break;
    }
  }

  return (
    <>
      <button onClick={print}>Print receipt</button>
      <p>{status ? LABELS[status] ?? status : ""}</p>
    </>
  );
}
The /api/status route is four lines around the same GET /v1/printers/{id}/jobs/{jobId} call, forwarding only the status so the API key never reaches the browser.
Reporting real status instead of a spinner is worth the extra route. "Printed" is a fact you can show someone. A spinner that stops is a guess.
Step 6: watch paper come out
curl -X POST http://localhost:3000/api/print \
  -H "Content-Type: application/json" \
  -d '{
    "id": 1284,
    "placedAt": "2026-09-01T10:24:00Z",
    "items": [
      { "name": "Flat White", "quantity": 2, "unitPriceCents": 450 },
      { "name": "Croissant",  "quantity": 1, "unitPriceCents": 350 }
    ]
  }'
{ "jobId": 90210, "printerId": 42, "status": "queued" }Or click the button. Either way the printer wakes up a moment later. Median time from the call to paper is under a second and a half in my testing, which is fast enough that it feels like the same action as clicking the button.
Step 7: what the statuses mean
status: "queued" means accepted, not printed. If you are printing from a background job with no UI to poll from, the same wait works server side:
// lib/confirm.ts
const TERMINAL = ["printed", "failed", "expired"];

export async function waitForPrint(printerId: number, jobId: number) {
  for (let attempt = 0; attempt < 10; attempt++) {
    const res = await fetch(
      `https://api.receiptful.io/v1/printers/${printerId}/jobs/${jobId}`,
      { headers: { Authorization: `Bearer ${process.env.RECEIPTFUL_API_KEY}` } },
    );
    const job = await res.json();
    if (TERMINAL.includes(job.status)) return job.status;
    await new Promise((r) => setTimeout(r, 1000));
  }
  return "timeout";
}
A job walks through queued, notification_sent, notification_received, printing, then printed. If the printer is off it sits and waits, and when the TTL runs out it goes to expired rather than printing a stale order later.
That last behaviour is worth designing around deliberately. A receipt that shows up 40 minutes late is worse than one that never showed up at all, because now somebody has to work out which order it belongs to.
Gotchas that cost me time
A space between two tags is not a space. My first version was <b>TOTAL</b> <b>$15.50</b> and it printed as TOTAL$15.50, jammed together. Whitespace-only text between tags gets normalised away, so if you want two things on one line with a gap, put them in a table row. That is why the total above is a table and not a paragraph, and it right-aligns to match the line items as a bonus.
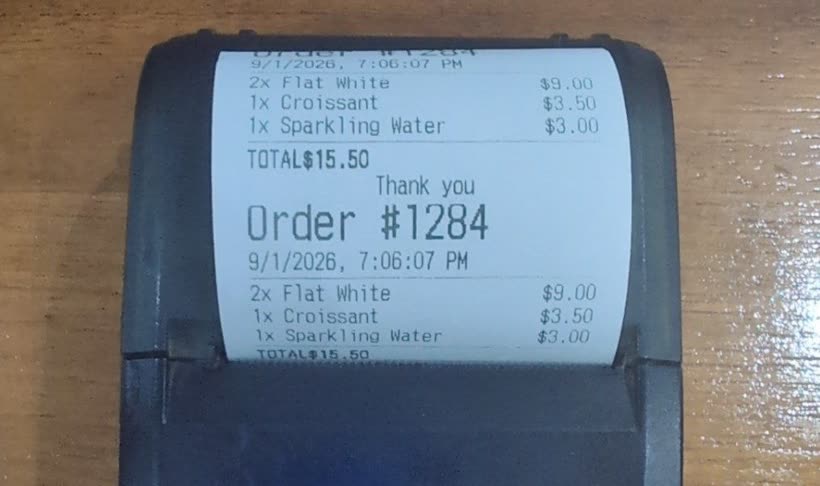
That is the actual paper from the first run. Two takes, and you can read the bug on both.
Never call the printing API from the client. NEXT_PUBLIC_ on that key ships it to every visitor. The route handler exists so the key stays on the server.
Do not await the print in your checkout path. Return the order to the user, print in the background. A printer that is briefly offline should not turn into a failed checkout.
Test with the printer off. It is the state you will actually hit in production, and you want to know what your code does before a customer finds out.
32 characters. I keep saying it because I keep forgetting it. Three columns looks fine in Chrome and prints as noise.
Why not QZ Tray, or a print server?
Both are real answers and I looked at both.
QZ Tray is free, open source, and works offline, which is genuinely better than what I built here if you have a person sitting at the machine every time something prints. It stopped fitting because it connects a browser tab to a printer on the same machine. My end-of-day summary prints at 2am with nobody logged in, and no configuration makes a browser bridge do that.
Your own print server gives you total control. It also gives you agent packaging for three operating systems, auto-update, retries, VPN or tunnel management, and a pager for when a store's printer stops responding on a Saturday. Worth it if printing is your product. Not worth it for one feature.
That is the whole thing
Every file is in this post, so you can paste it straight into a fresh Next.js app. Receiptful is free to start with no card, so if you have a printer in a drawer somewhere you can have this working today. Disclosure: I build it, which is also why the example uses it.
What are you printing? I am curious whether people are hitting this for receipts, kitchen tickets, or shipping labels, because the constraints are surprisingly different for each.