
Getting started with Receiptful: print your first receipt
From sign-up to paper in a few minutes. Add a printer, pair the app, and POST your first receipt — no drivers, no print server, no SDK.

Receiptful turns any backend into a receipt printer with a single API call. This guide walks the whole path — from signing up to paper coming out of a thermal printer — with a screenshot at every step. It takes a few minutes, and there is nothing to install on a server.
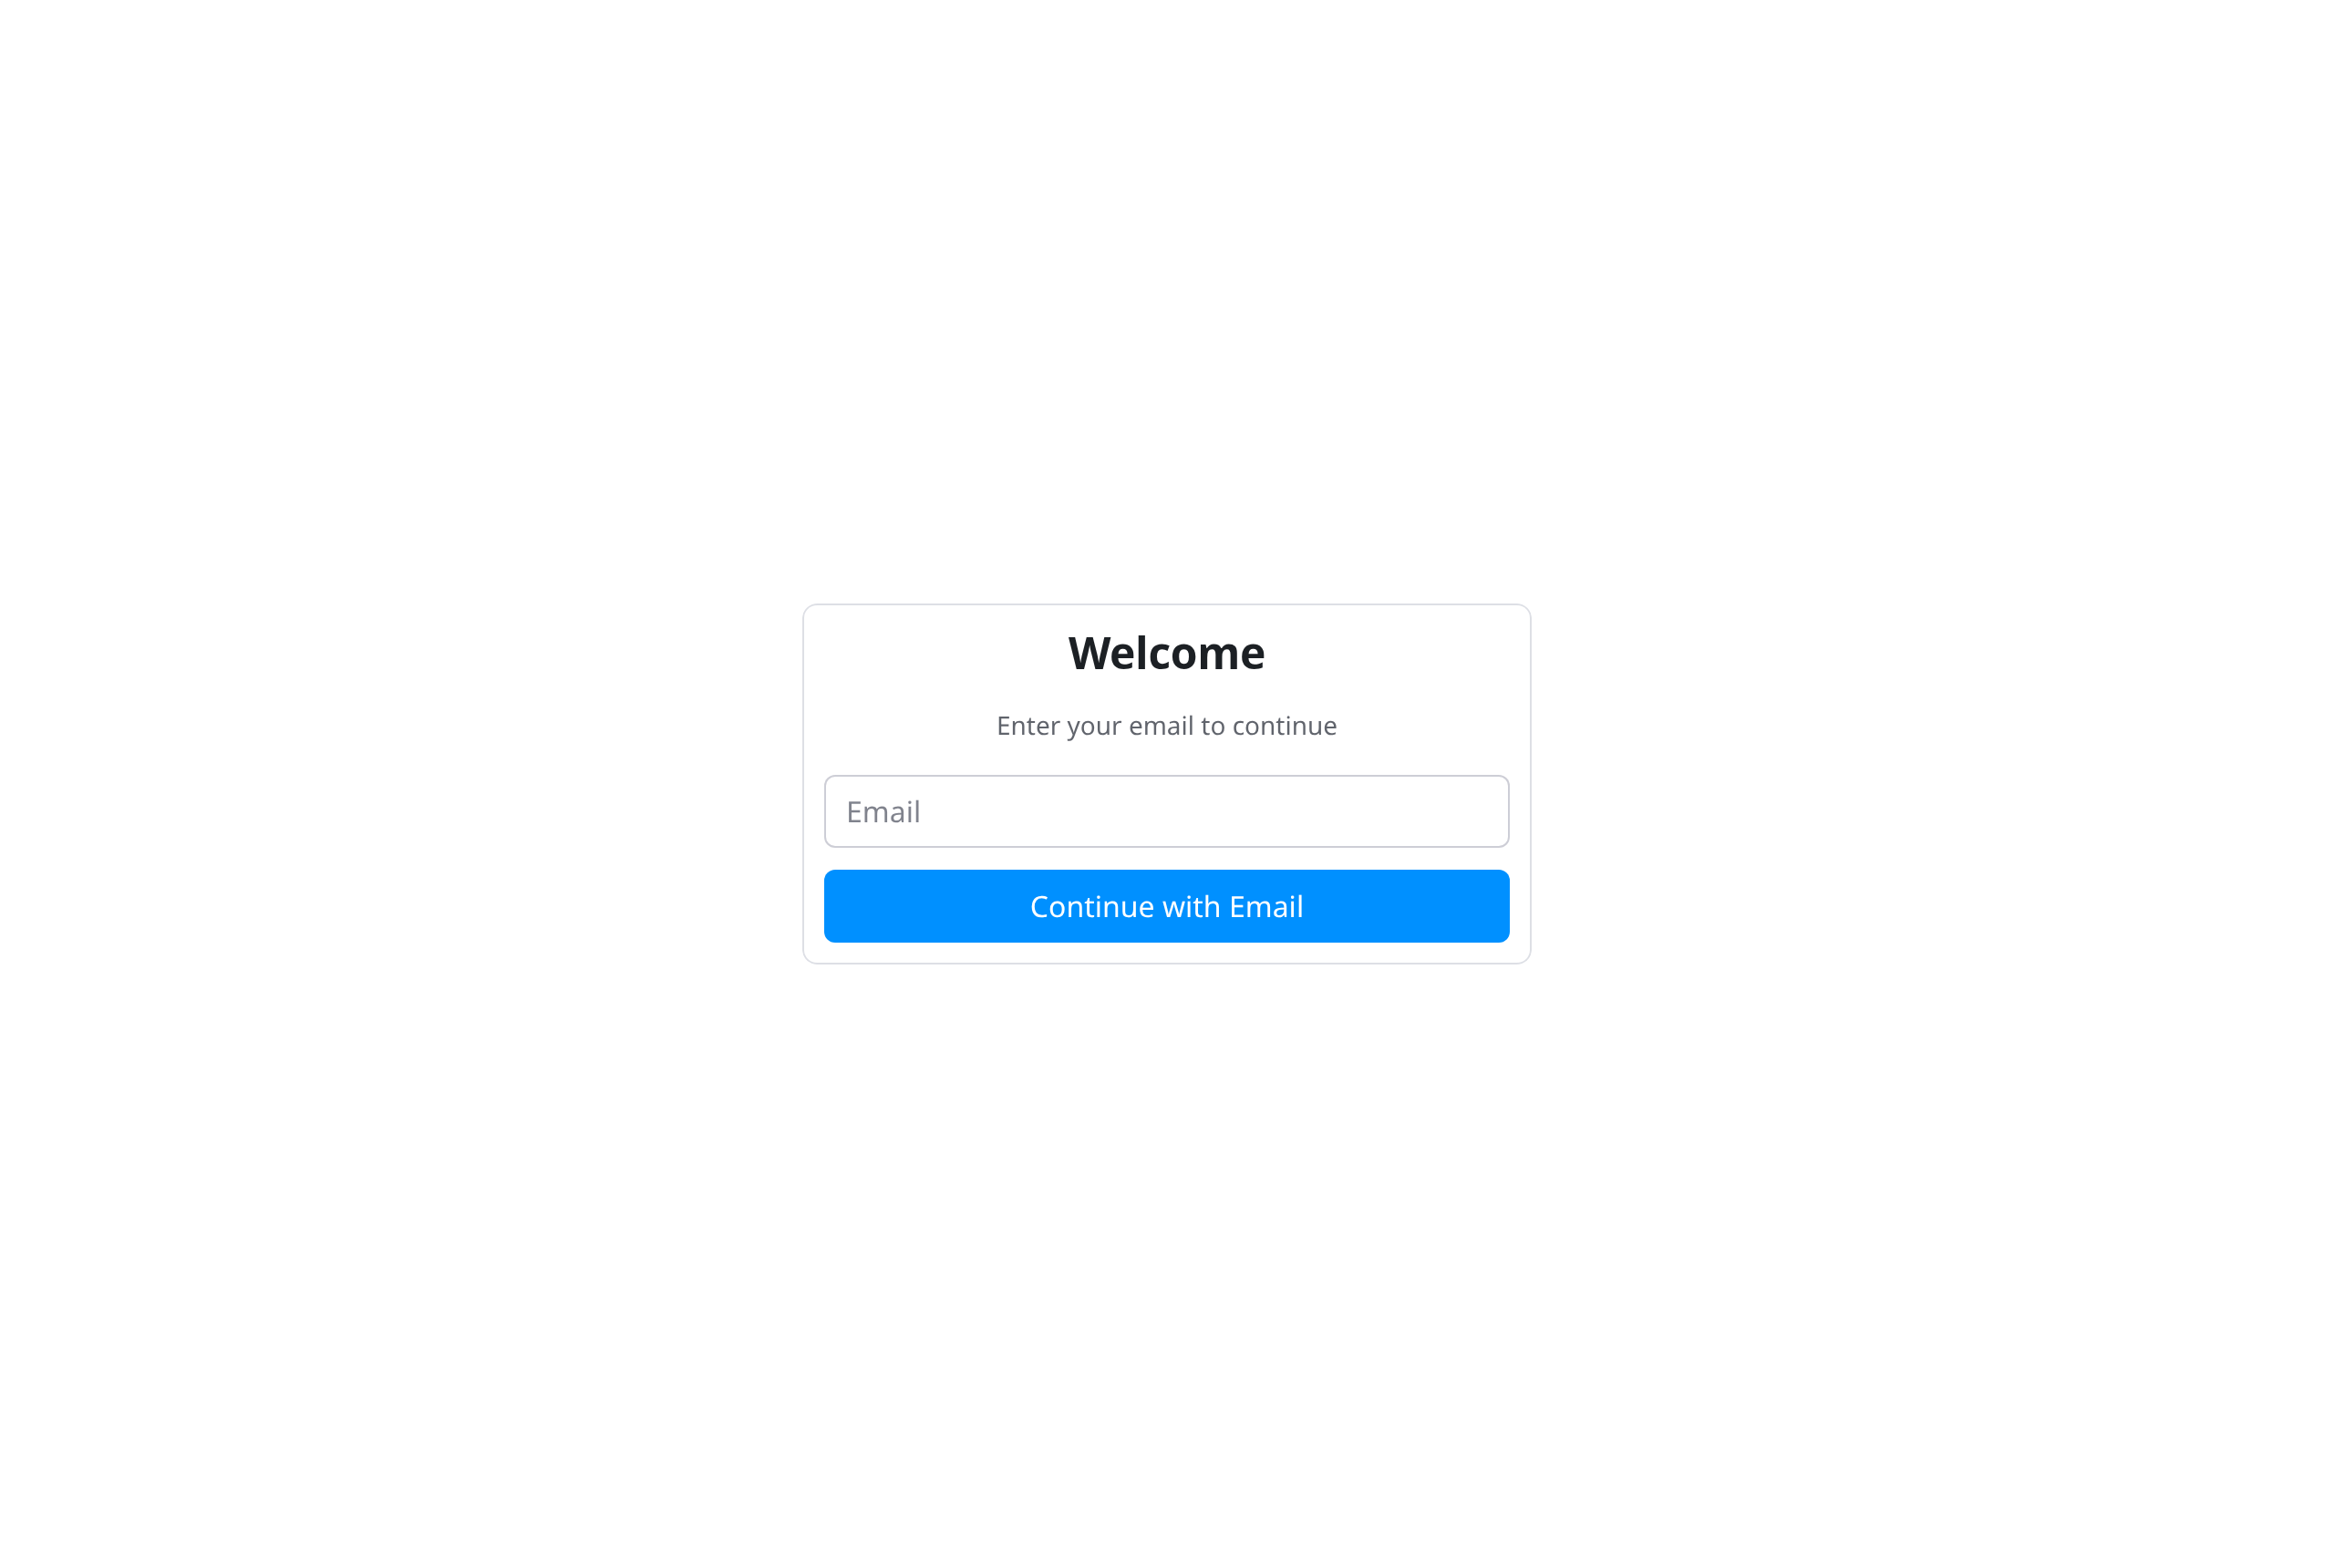
Sign in — no password
Open the console and enter your email. We send a magic link; click it and you are in. No password to choose, no signup form to fill out.
You're already set up
There is no setup wizard. The moment you sign in, Receiptful creates your workspace and a first project for you. You land on an empty Printers page — the only thing left to do is add a printer.
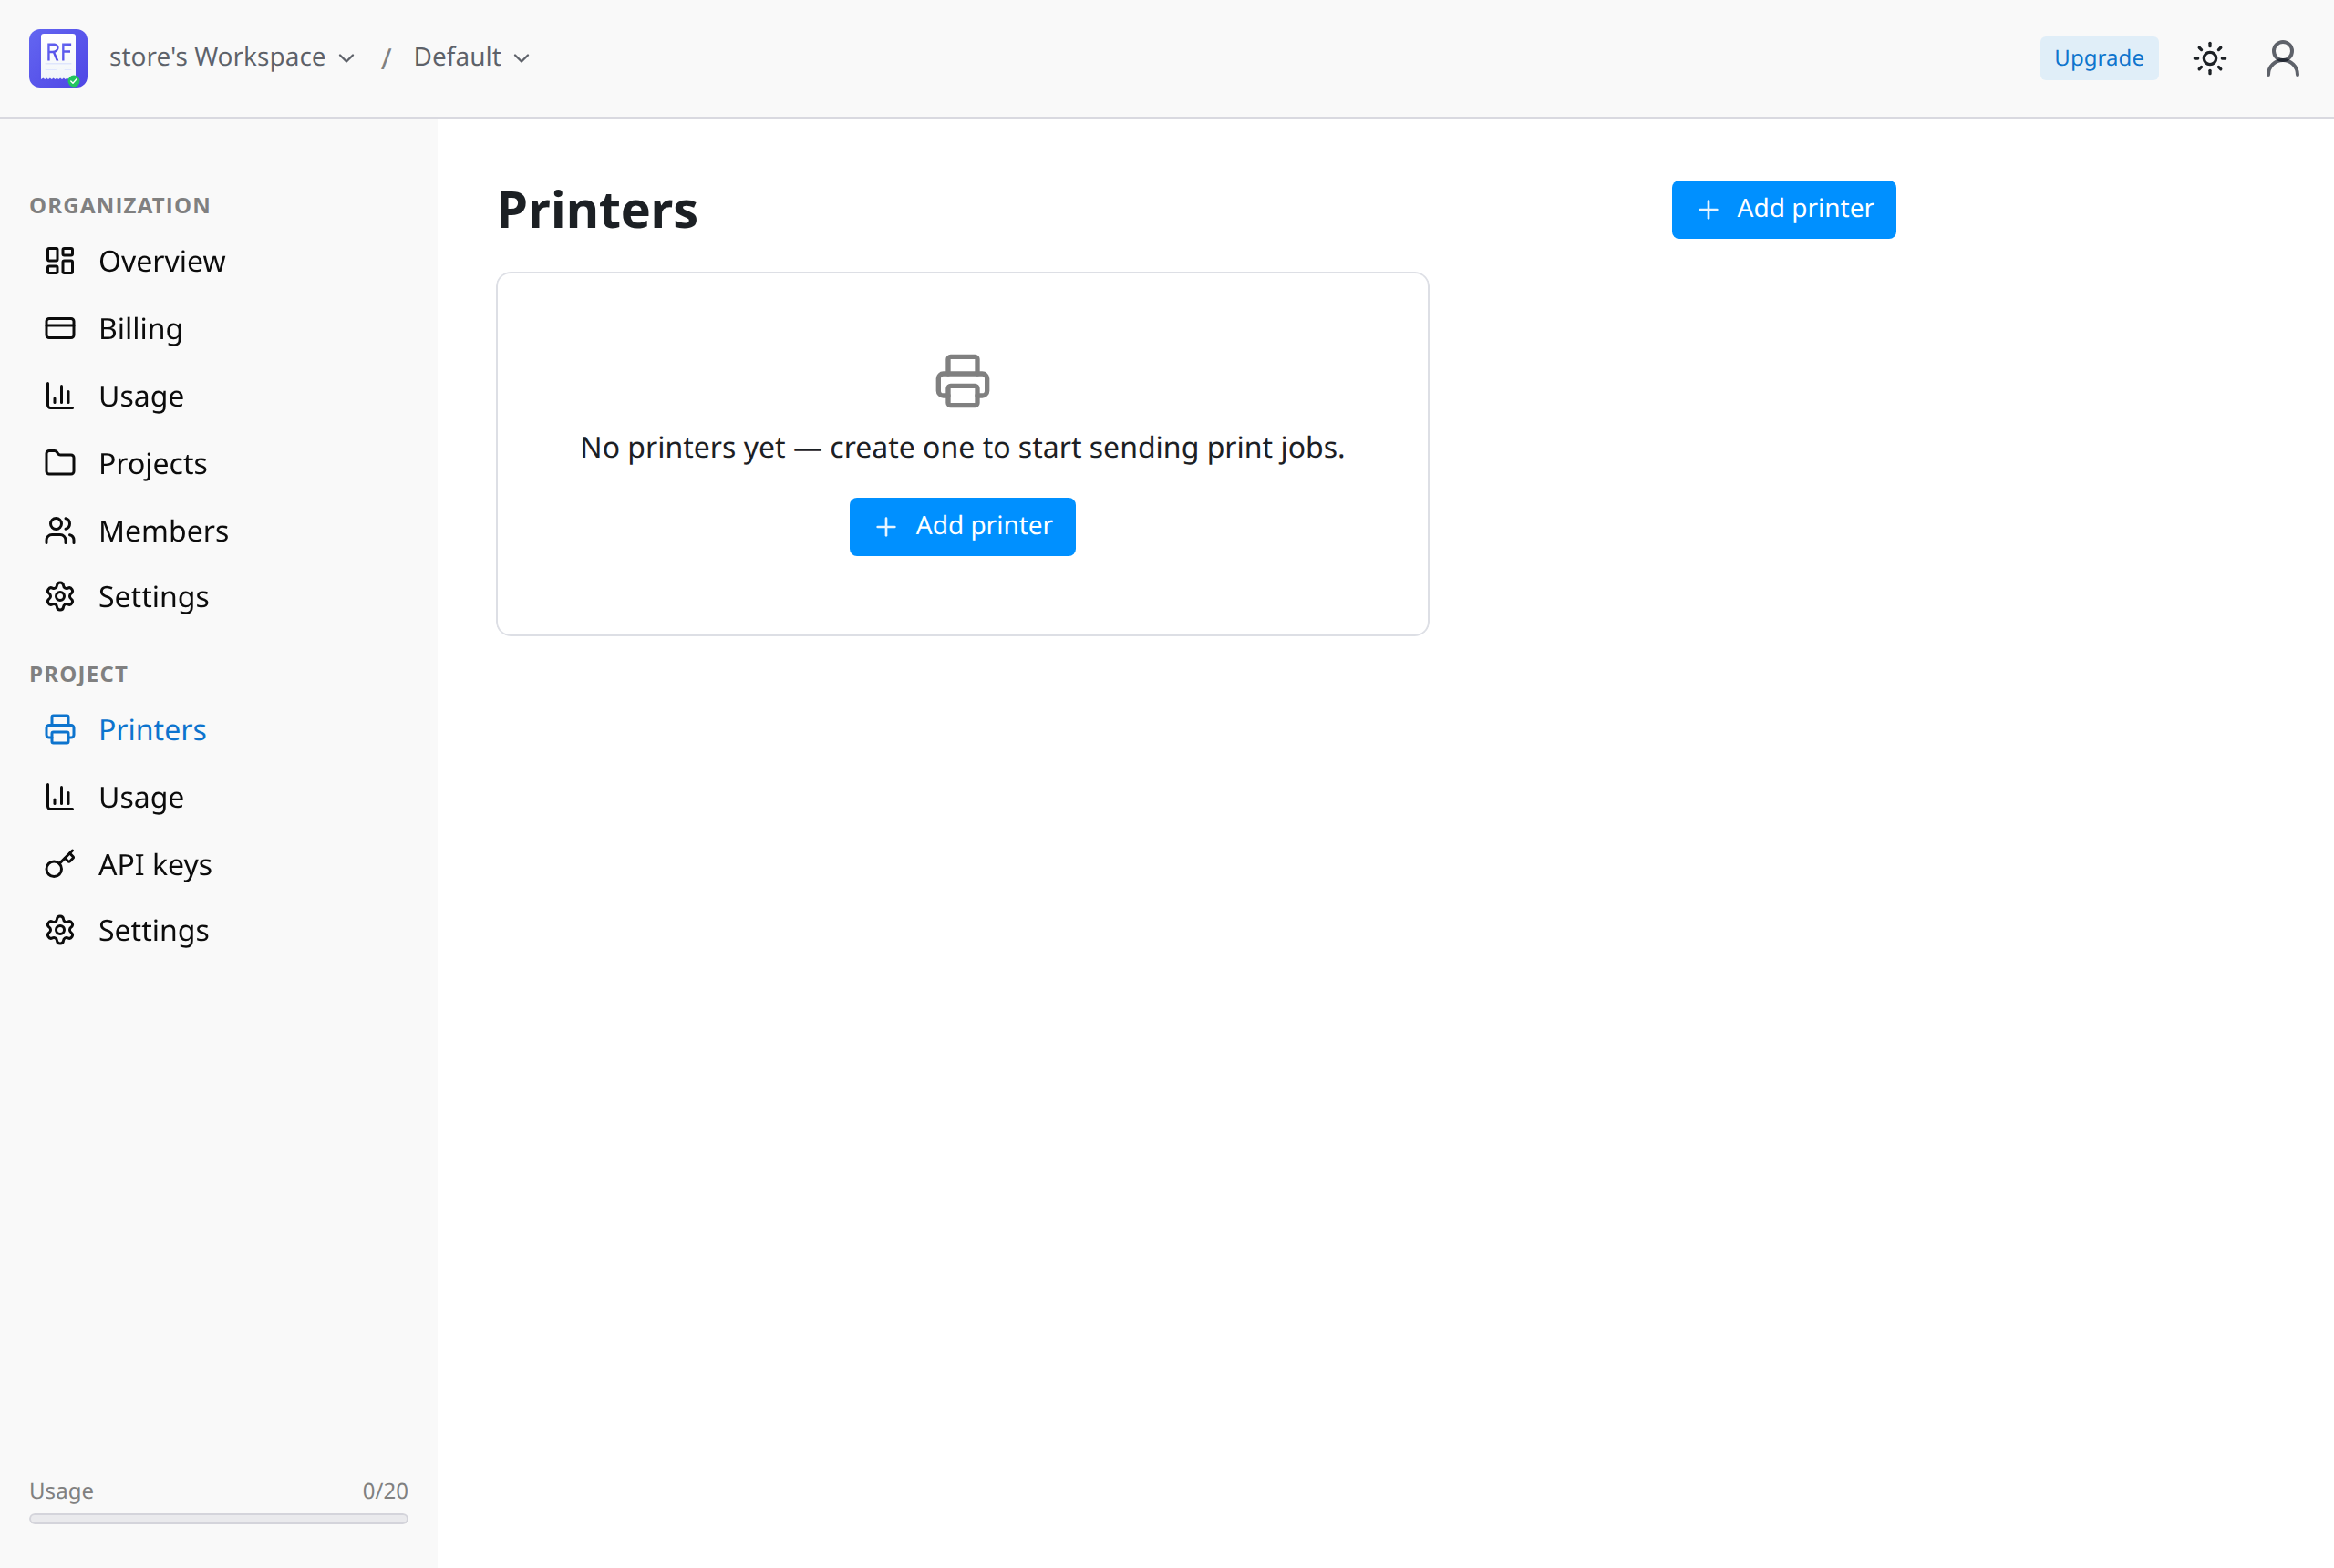
Add your printer
Click Add printer, give it a name like "Front desk", and pick the profile that matches your hardware.
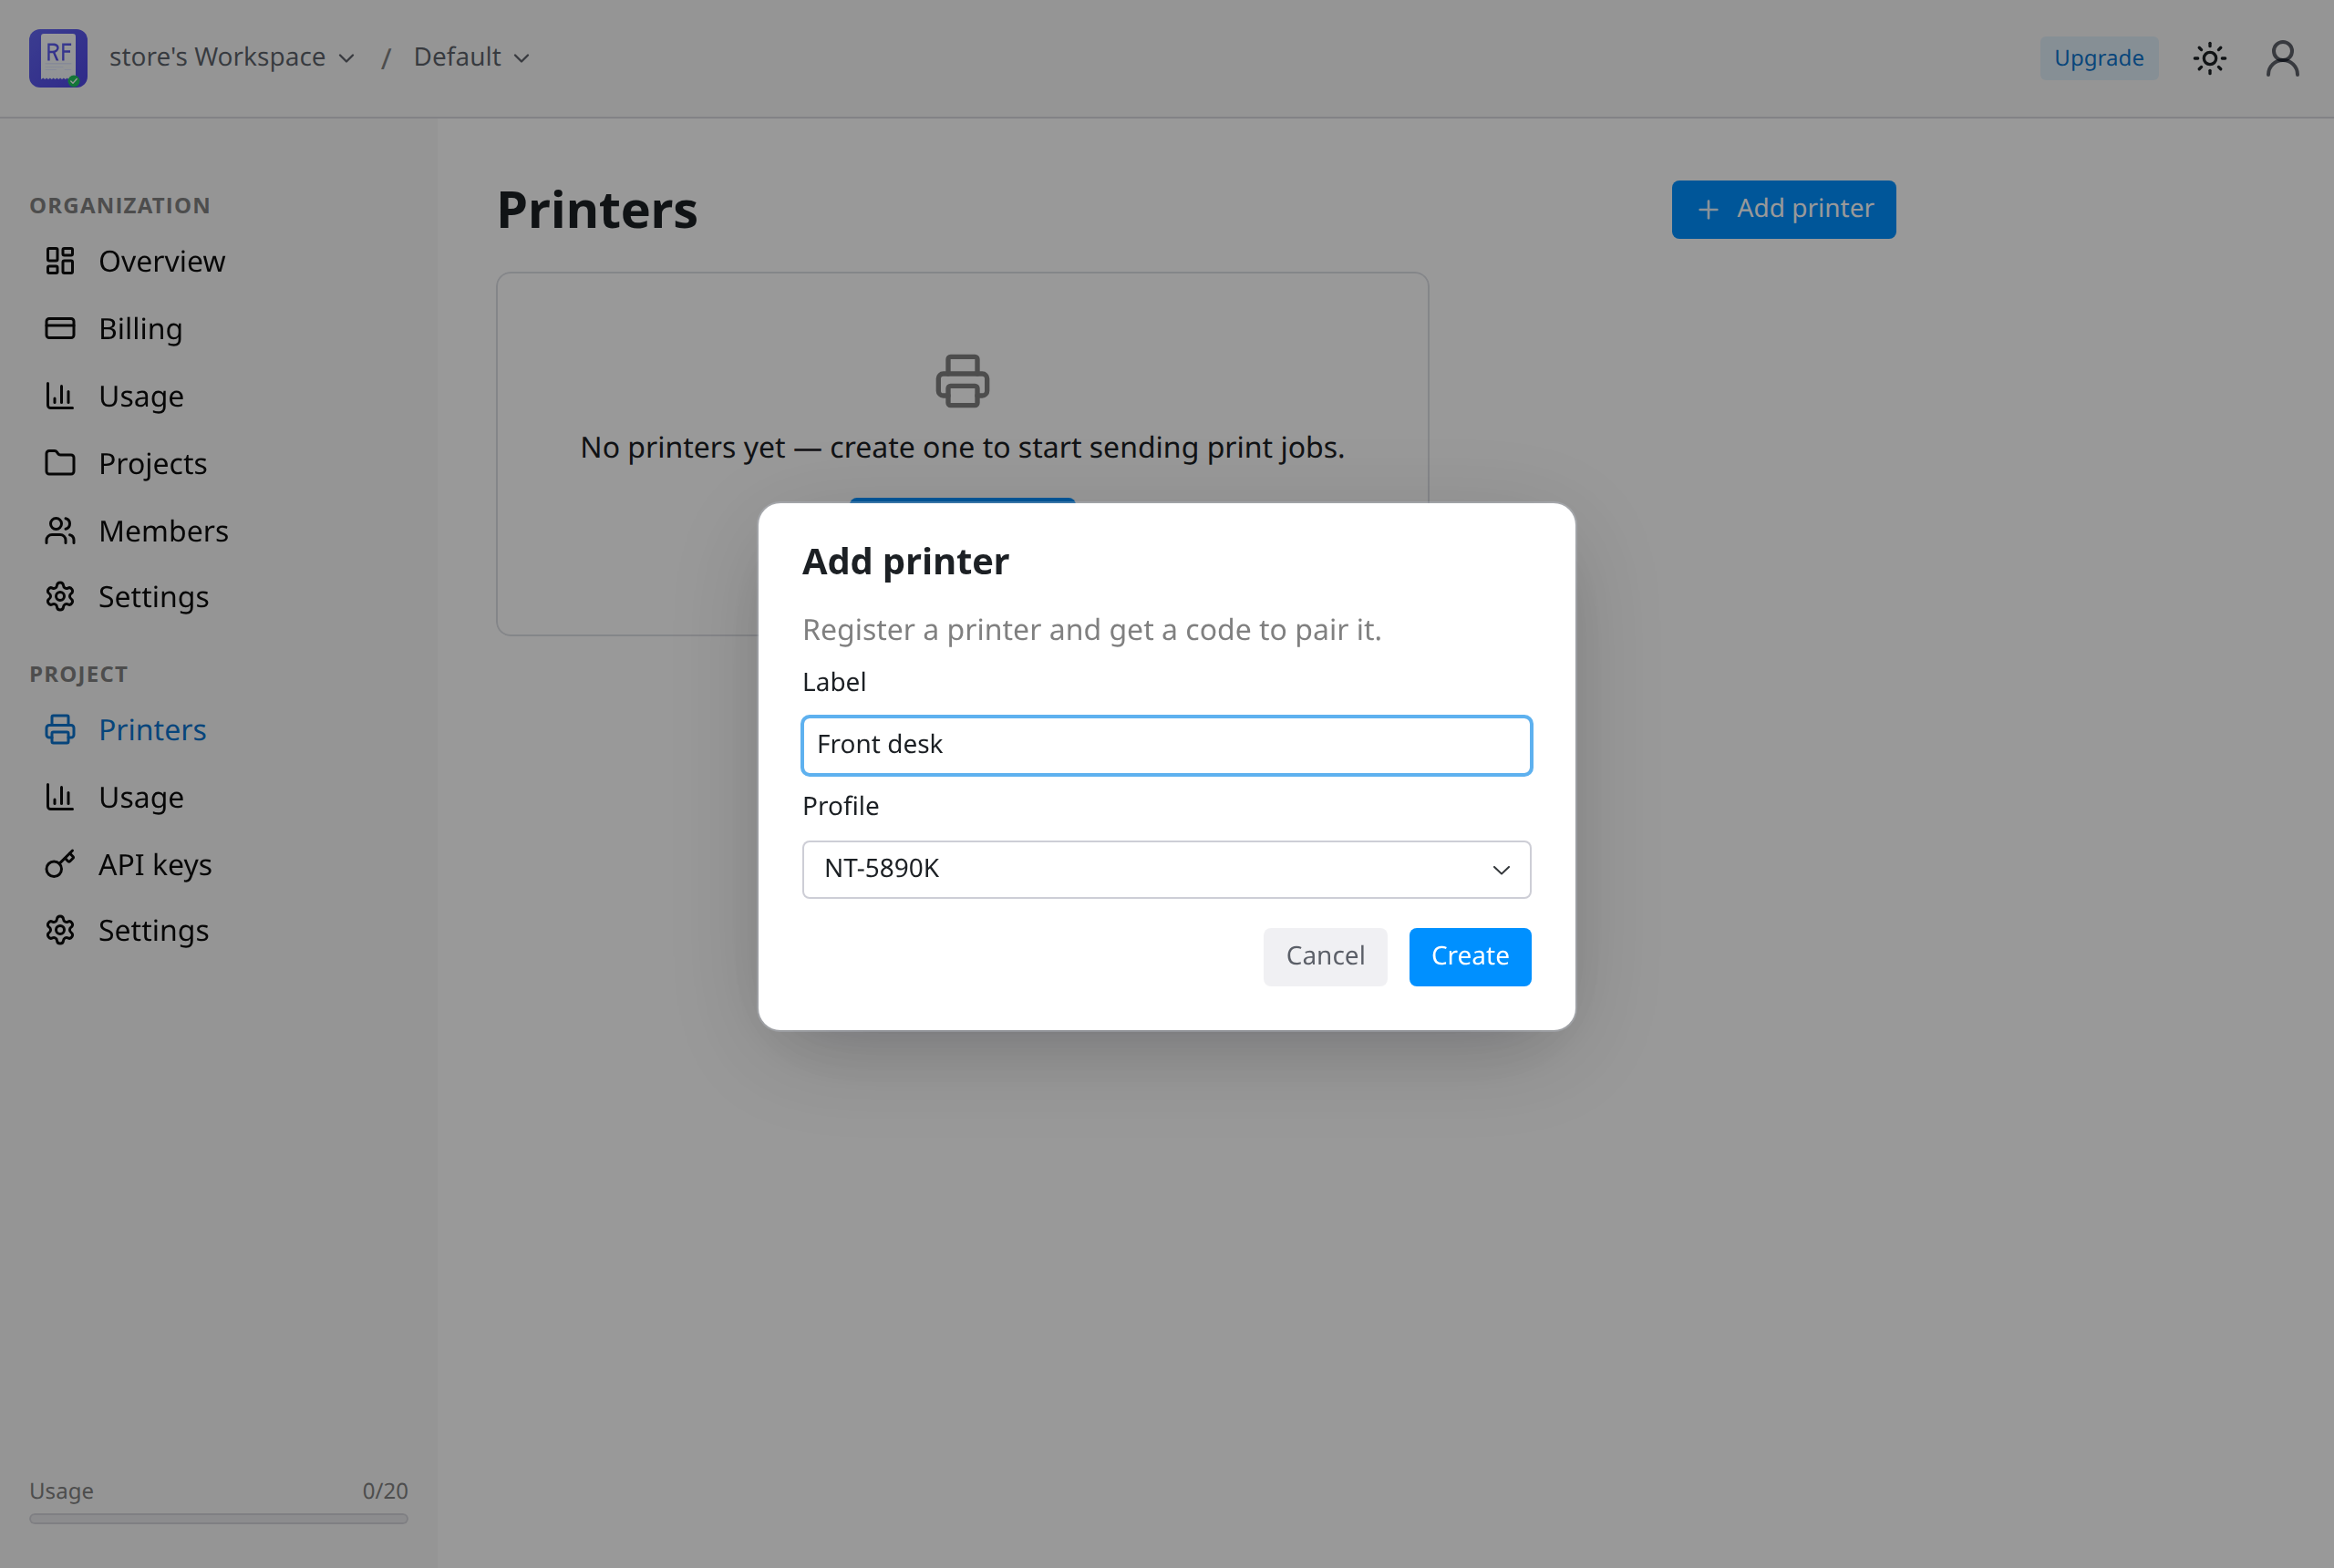
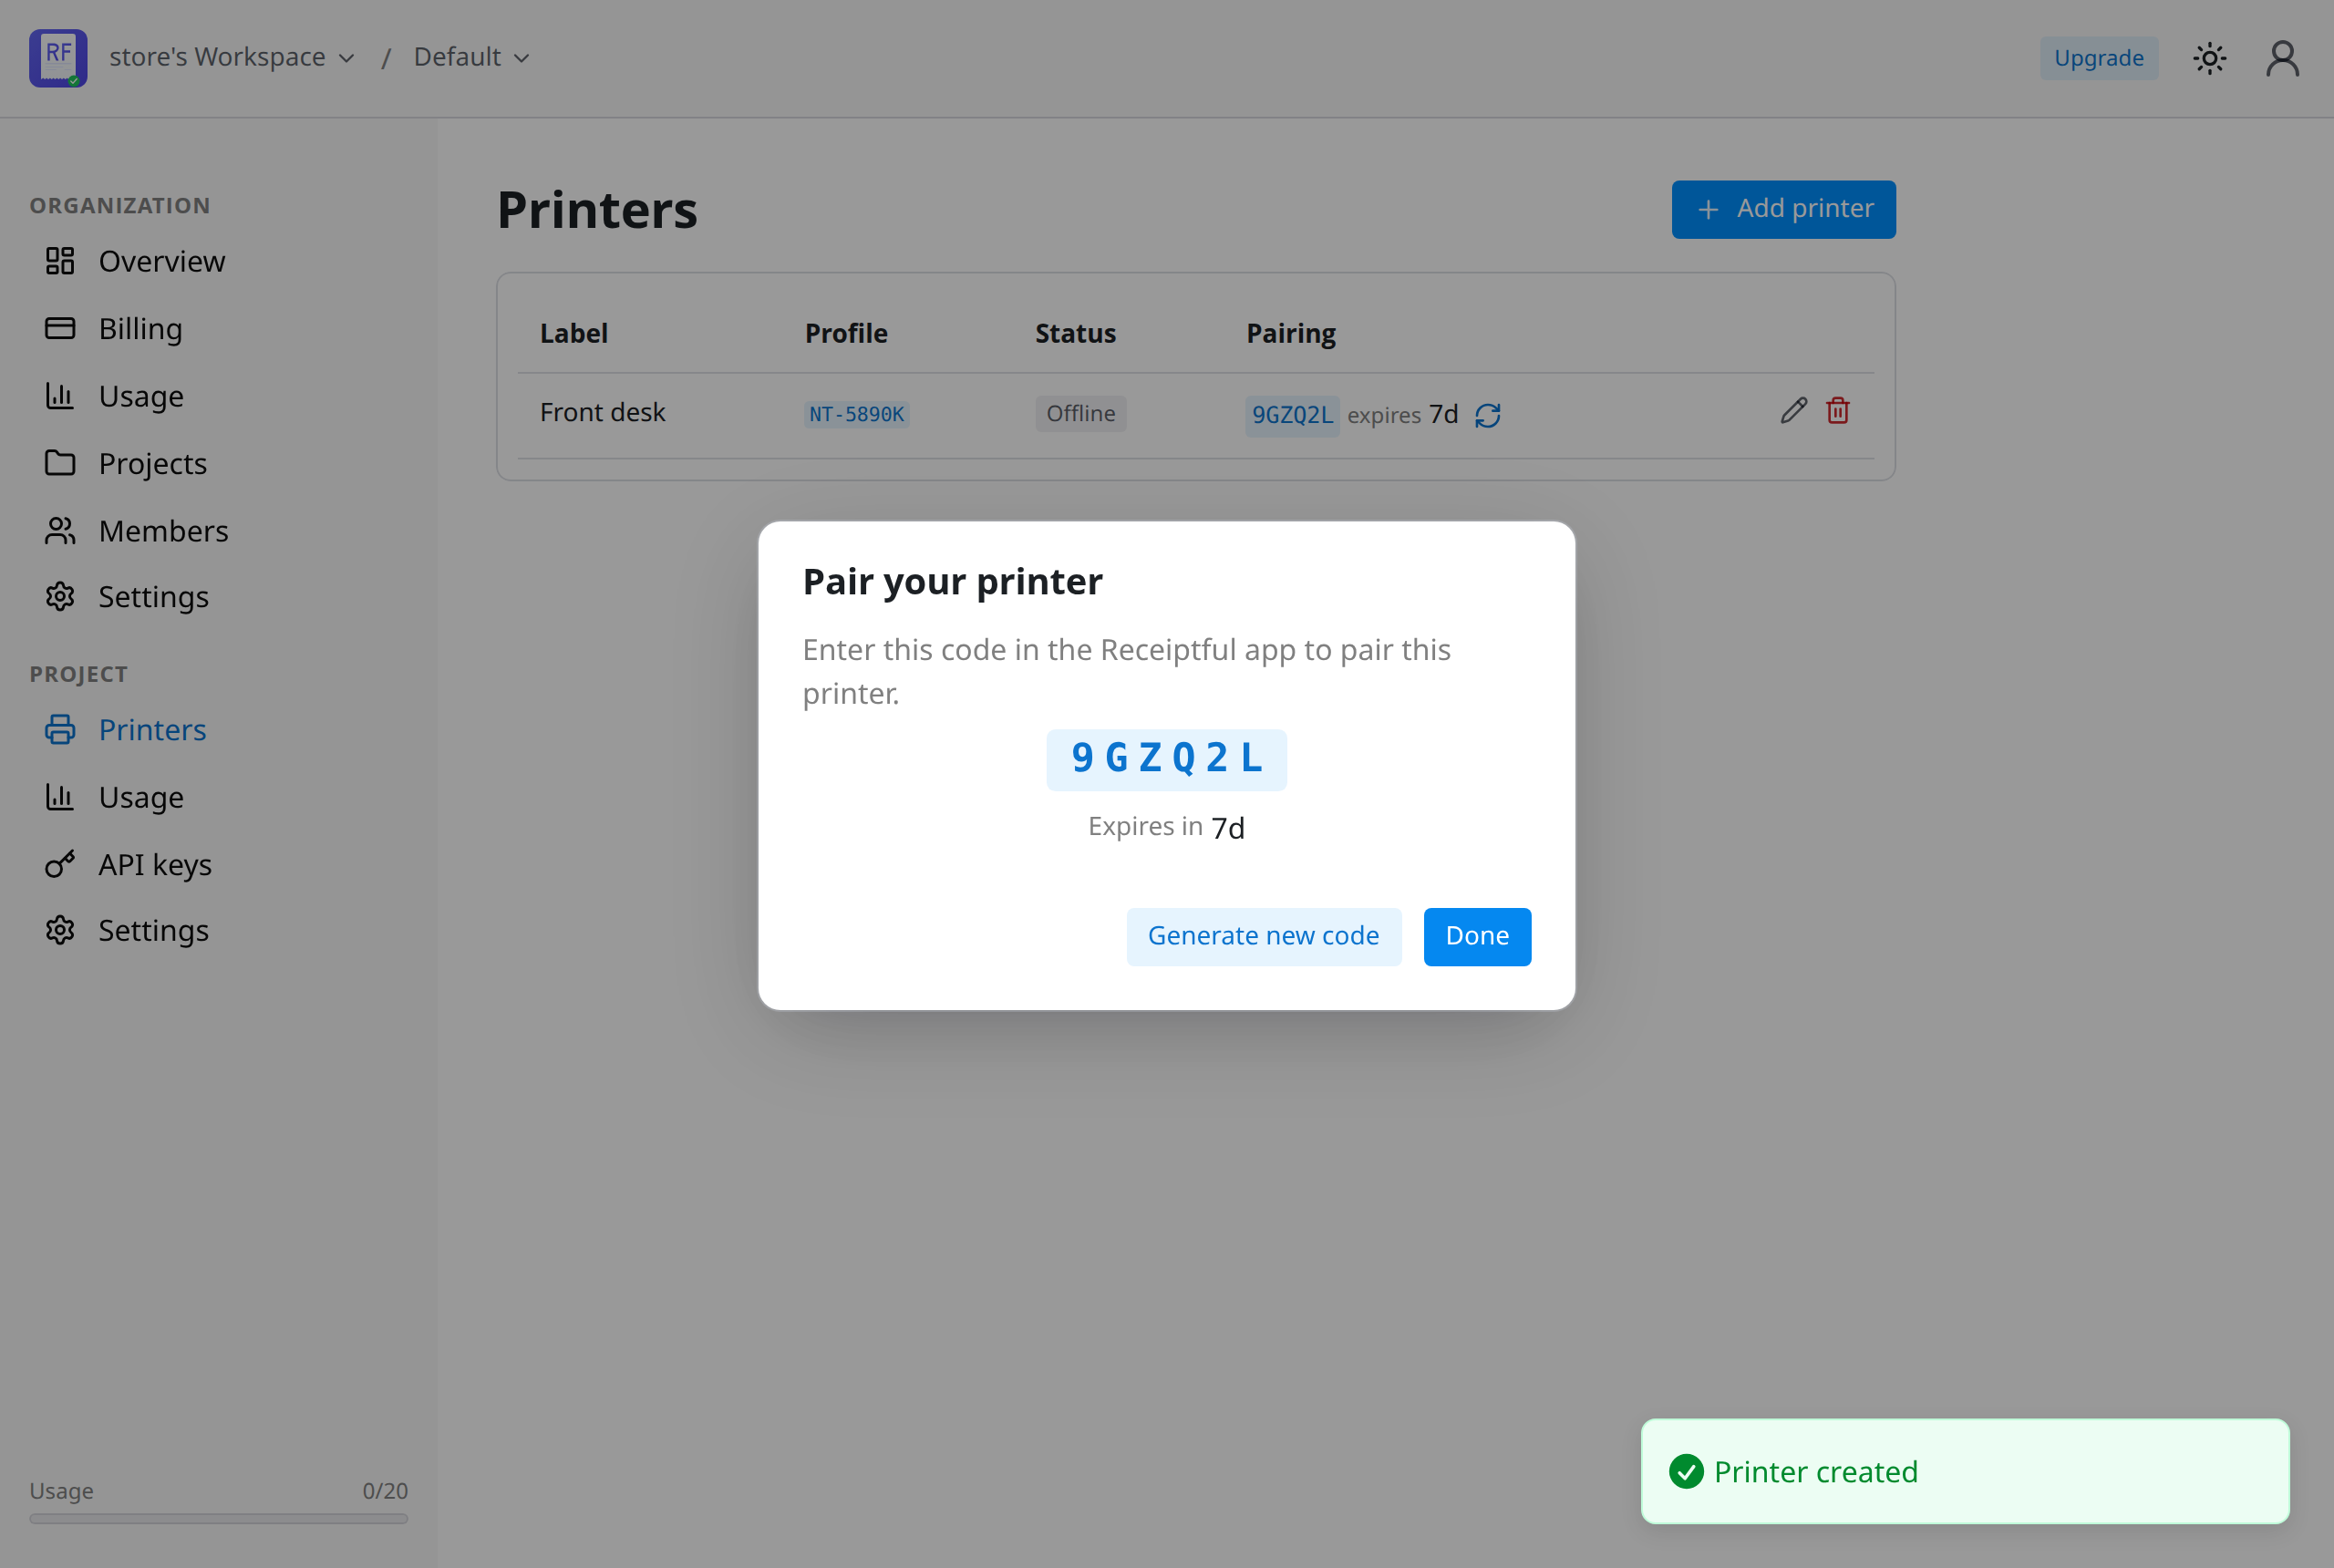
Receiptful generates a one-time pairing code. Keep it on screen — you will type it into the app in the next step.
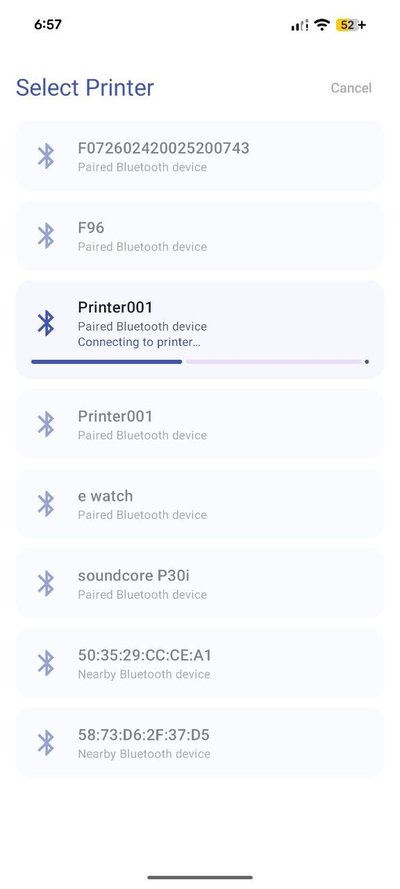
Pair the app
Install the Receiptful app on the Android device that sits with your printer. On first launch it asks for a Connection Code — enter the pairing code from the console and tap Log in.

Now pick your printer. The app scans for nearby Bluetooth and USB printers; tap yours and let it pair. If it is a Bluetooth printer with a PIN, choose Try automatically and the app runs through the common 0000 / 1234 codes for you.
The app prints a short connection receipt to confirm — real paper, right away.
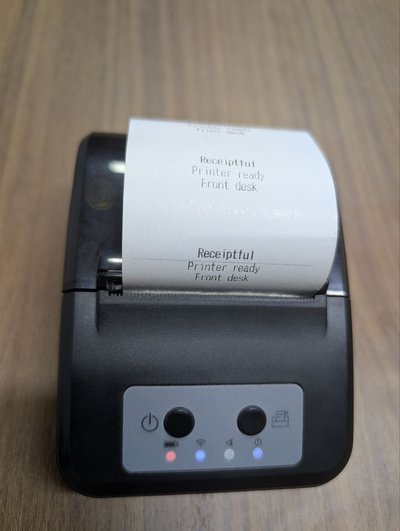
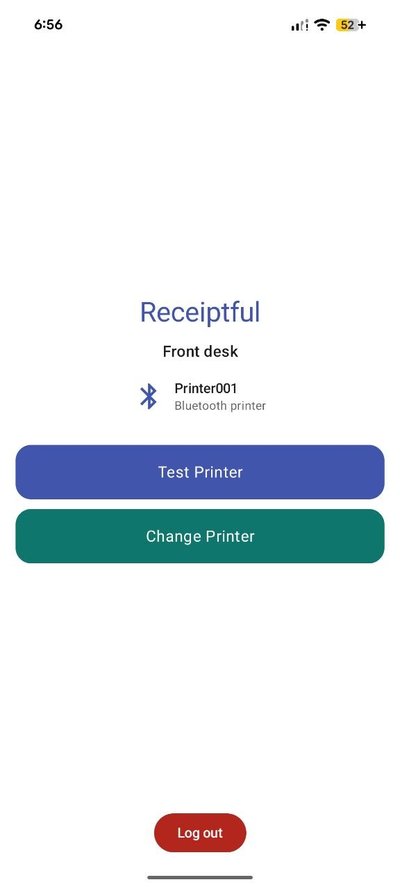
It then settles into its ready state — "Ready to receive print commands." That device stays paired and wakes on demand.
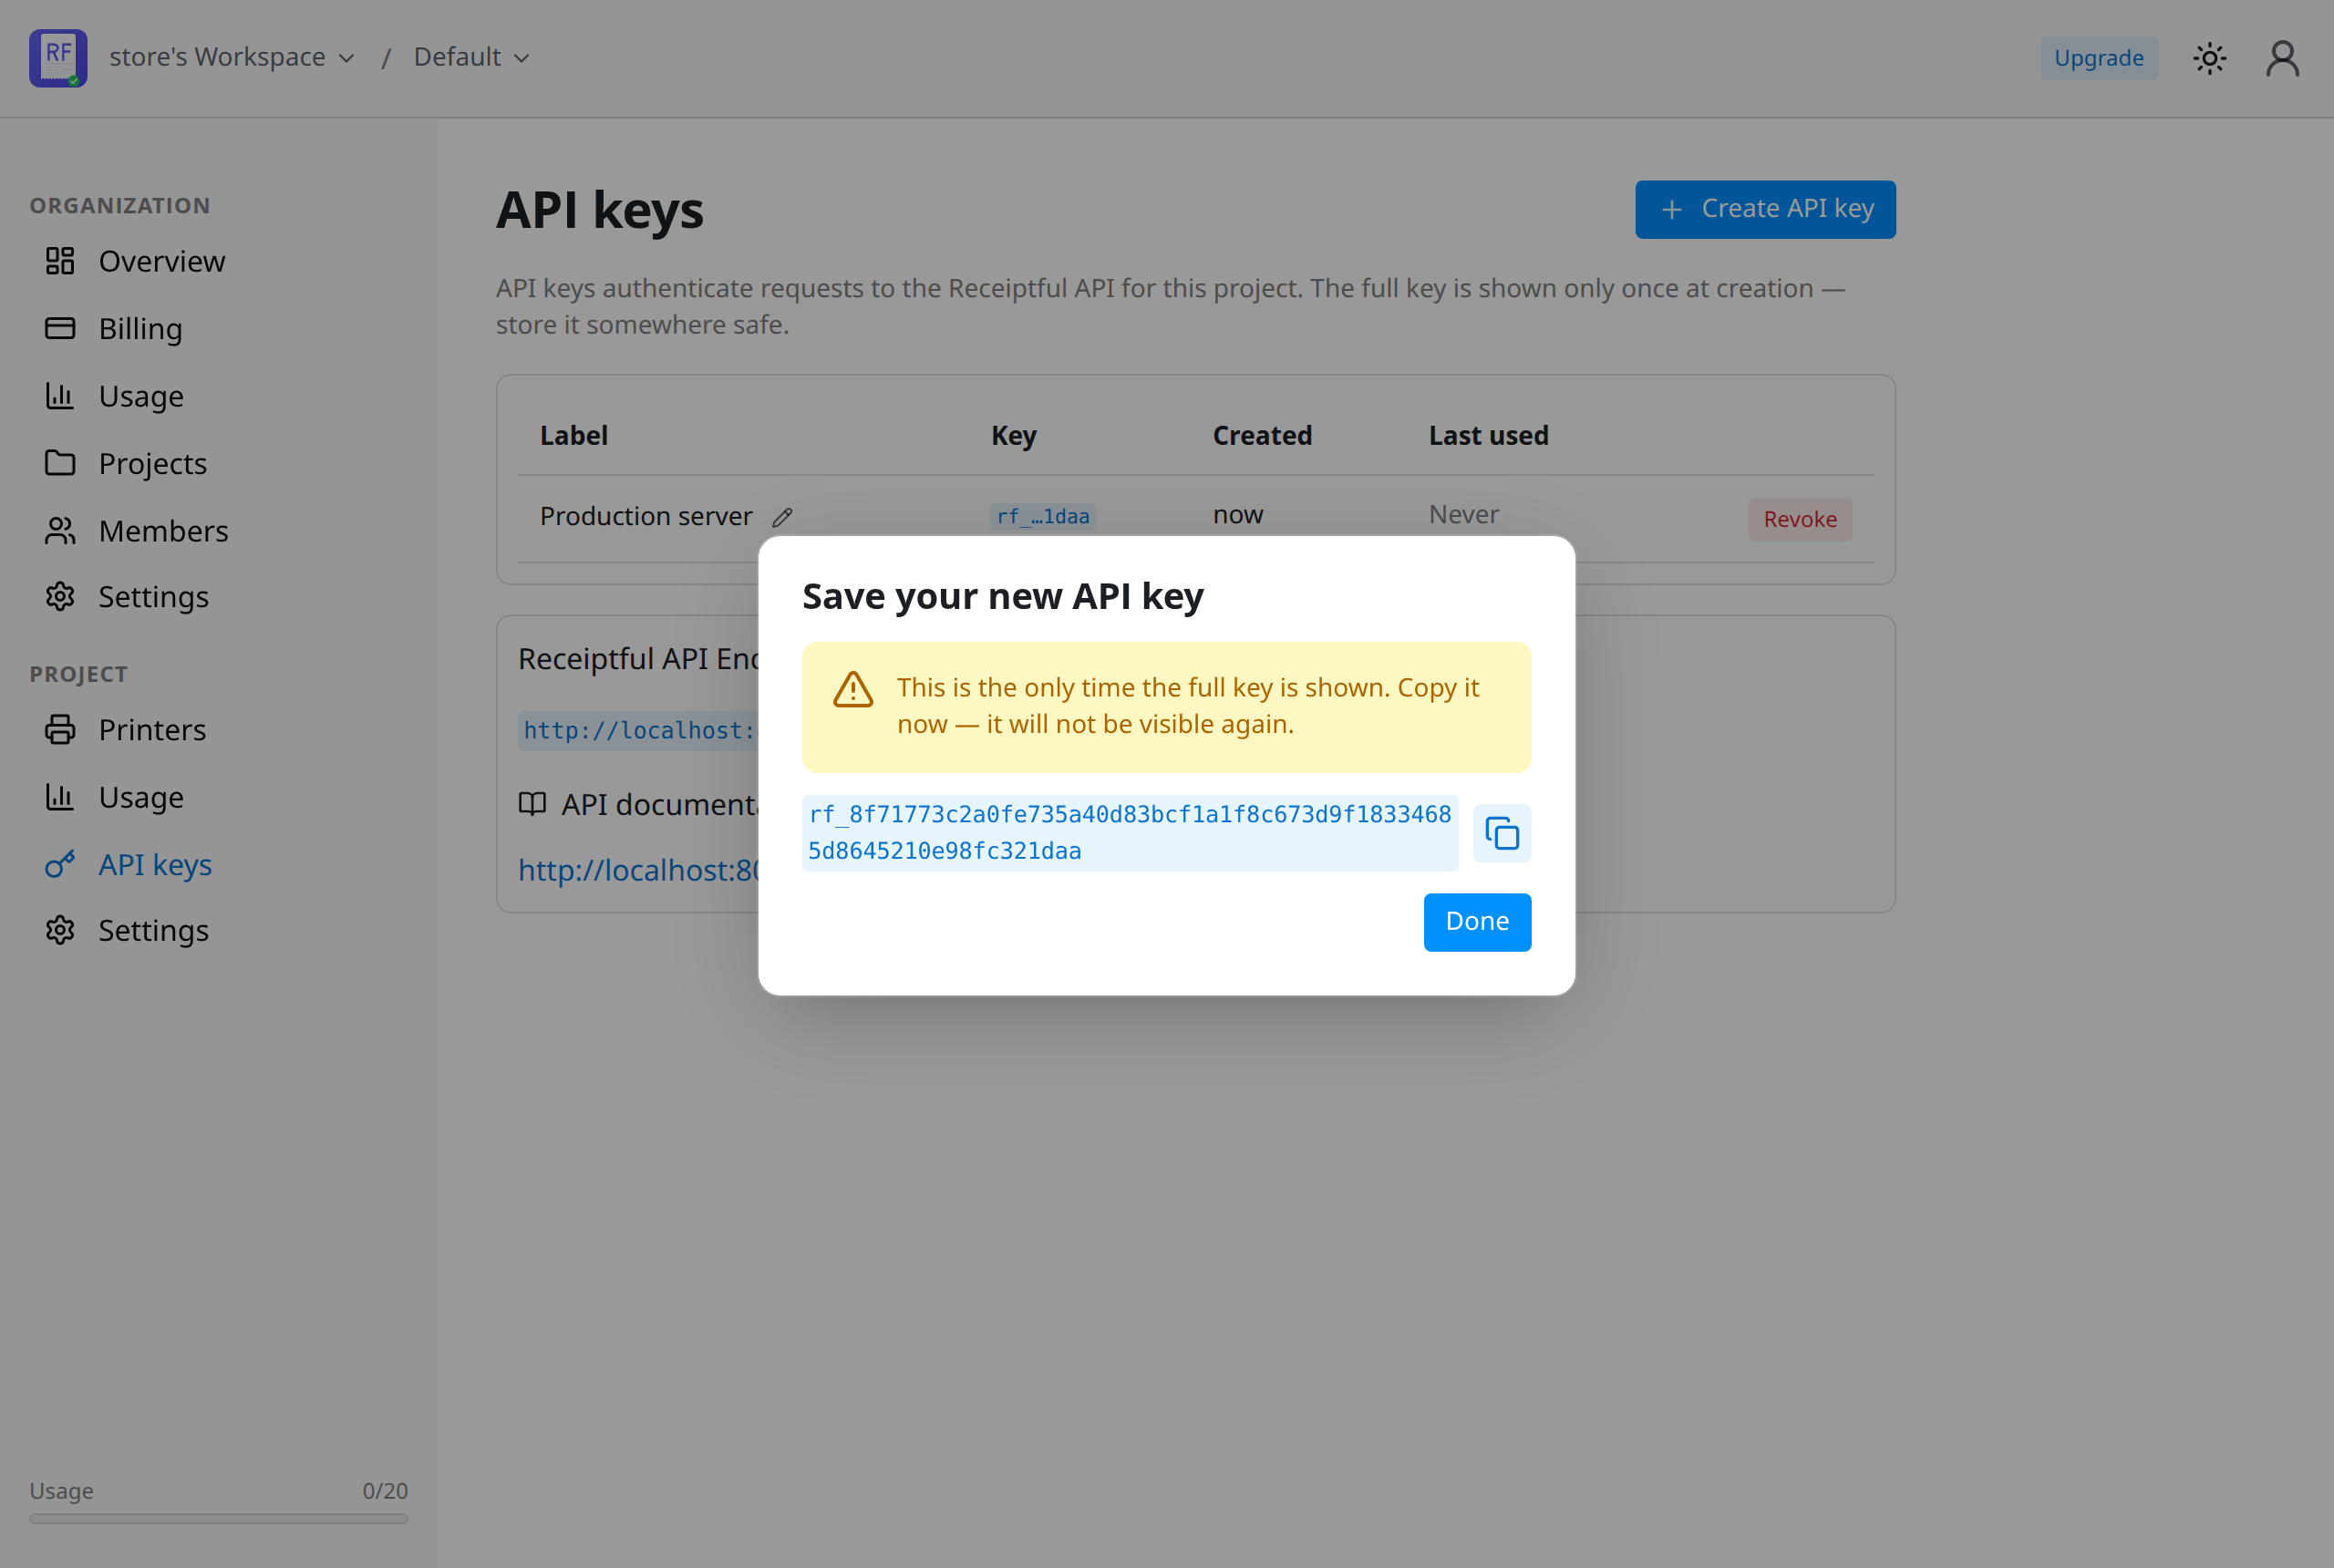
Grab your API key
Back in the console, open API keys and create one. The full rf_… key is shown only once, so copy it now and store it somewhere safe.
Send your first receipt
That is the whole setup. Now POST some HTML to your printer's job endpoint:
curl https://api.receiptful.io/v1/printers/42/jobs \
-H "Authorization: Bearer rf_live_3f9c…" \
-H "Content-Type: text/html" \
--data '<h1>Order #1284</h1><p>2× Flat White ......... $9.00</p>'The API responds with the job it created:
{
  "id": 9281,
  "printer_id": 42,
  "status": "created",
  "lifetime_seconds": 600,
  "created_at": "2026-06-22T10:24:01Z",
  "expires_at": "2026-06-22T10:34:01Z",
  "status_updated_at": "2026-06-22T10:24:01Z"
}
Seconds later, paper comes out of your printer. One authenticated POST, one JSON response — no drivers, no print server in between.
What's next
- Style receipts with plain HTML. Send ordinary HTML and we render it to ESC/POS for your specific printer. See the API docs.
- Track every job. A job moves through
created → notification_sent → notification_received → printing → completed— poll it to see where it is. - Set an expiry. A receipt that prints an hour late is worse than one that never prints, so jobs expire on purpose (ten minutes by default).
- Start free. 20 receipts a month, no card required. Usage-based after that.
Open the console and print your first receipt.