
Designing receipts with HTML for 58mm thermal paper
58mm rolls are about 32 characters wide and print in one color. Here is how to lay out a receipt that stays readable inside those limits, using plain HTML.
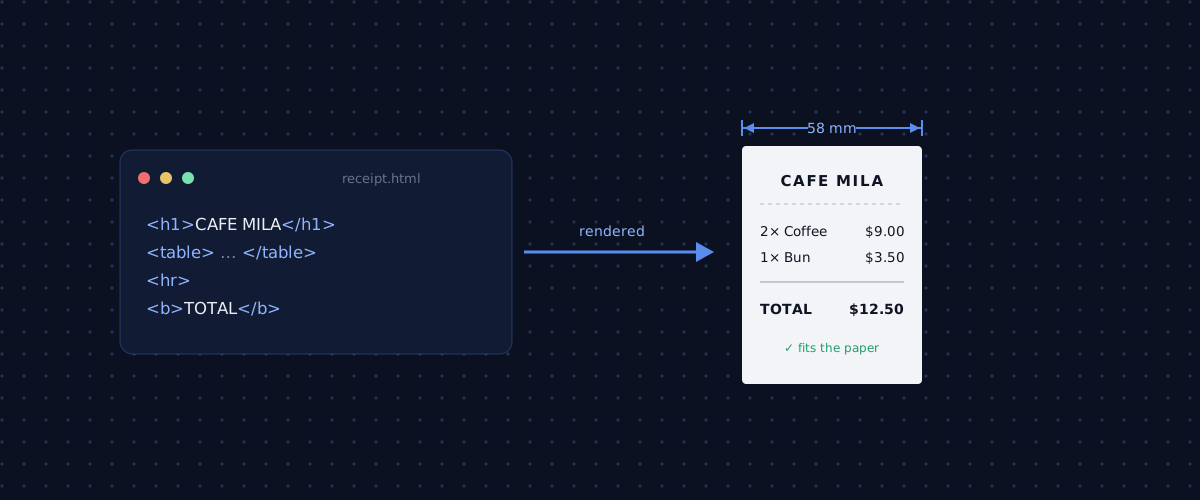
Designing for a receipt is not like designing for a web page. The canvas is about 48mm of printable width, there is exactly one ink color, and the reader is glancing at it for two seconds while handing back change. If you bring web habits to it, multiple columns, background colors, delicate type, you get a smeared, unreadable mess.
The good news is that HTML is a fine way to describe a receipt, as long as you respect the constraints. This post covers what those constraints are and how to work inside them. It applies whether you render the HTML yourself or send it to a print API that renders it for you.
Think in characters, not pixels
A 58mm roll gives you roughly 32 characters per line at the standard font, and about 42 at the smaller one. That number is your real layout budget. Pixels do not mean much on a printer that is quite happy to reflow your careful CSS.
So before writing any markup, sketch the receipt as fixed-width text and count columns:
CAFE MILA
Order #1284
--------------------------------
2x Flat White             $9.00
1x Croissant              $3.50
--------------------------------
TOTAL                    $12.50
That is 32 columns. If your design does not fit as plain text, it will not fit on paper either.
One column, always
There is no room for two columns of content side by side. A sidebar, a two-up grid, a logo floated next to text, none of it survives at this width. Lay everything out in a single vertical stack and let the eye travel straight down.
The one exception is a row with a label on the left and a number on the right, like an item and its price. That is not really two columns, it is one line with both edges used, and it is the backbone of a receipt.
Use alignment, not layout
Your layout tools are basically three: left, center, and right. Center the header and any thank-you line, left-align the body, and right-align every number.
For those label-and-price rows, a full-width table is the sturdiest approach because it keeps the price pinned to the right edge no matter how long the name is:
<table width="100%">
  <tr><td>2x Flat White</td><td align="right">$9.00</td></tr>
  <tr><td>1x Croissant</td><td align="right">$3.50</td></tr>
</table>
Right-aligned prices give you a clean vertical line of figures that a person can add up at a glance. Left-aligned or centered prices read as noise.
One color, so emphasize with weight and size
Thermal printers print in a single color. There is no gray, no brand blue, no highlight. Every color in your CSS collapses to either "ink" or "no ink," so anything you were using color to communicate has to move to another channel.
You have two that work reliably:
- Bold for the few things that matter, like the total.
- Size, usually a normal size and a larger one, for the store name and the total.
Reserve the large size for one or two elements. If everything is big, nothing is. A common and readable hierarchy is a large centered store name, normal-size body, and a bold, slightly larger total.
<h1 style="text-align:center">CAFE MILA</h1>
<!-- body at normal size -->
<p><b>TOTAL</b> ......... <b>$12.50</b></p>
Do not lean on background colors to make a band stand out. A filled background either prints as a solid black block with unreadable text on top, or does not print at all. Use a horizontal rule or a blank line instead.
Let dividers and whitespace do the work
A receipt is scanned, not read. Horizontal rules and blank lines are what let someone find the total without reading every line. Group the receipt into clear zones and separate them:
- Header: store name, maybe address or order number.
- Body: the line items.
- Summary: subtotal, tax, total.
- Footer: thank-you, return policy, a code to scan.
A single <hr> between zones is usually enough. Resist the urge to box everything in borders. On thermal paper, one clean rule reads better than a table full of grid lines.
Handle long text on purpose
At 32 characters, a product name like "Oat Milk Cappuccino, Extra Large" will wrap. Decide what happens rather than letting the printer decide for you. Two reasonable options:
- Let it wrap onto a second line, with the price on the first line. Fine for the occasional long name.
- Truncate to a fixed length with an ellipsis if you would rather every item stay on one line.
Whichever you pick, test it with your longest real product name, not a short placeholder. Receipts break on the edge cases you did not print during development.
Keep images tiny or skip them
Thermal printers render images as one-bit black and white, and they render them slowly. A logo works if it is small, high-contrast, and already black on white. Photographs, gradients, and anything with fine gray detail turn to mud. If a logo does not read as a clean silhouette, plain bold text is the better choice.
Leave room at the end
Add a couple of blank lines after the footer. Printers cut a few millimeters below the last line, and without that trailing space you can lose your final row to the cutter. A short quiet zone before the cut is cheap insurance.
A quick checklist
Before you ship a receipt design, print a real one and check:
- Does it read as fixed-width text at about 32 columns?
- Is every number right-aligned into a clean column?
- Is there exactly one thing that is the biggest thing?
- Do the zones separate at a glance, without boxes everywhere?
- Does your longest product name still look right?
- Is there blank space before the cut?
Get those six right and the receipt will look deliberate on any 58mm printer.
Where the rendering happens
Someone has to turn this HTML into the printer's actual command language, ESC/POS, for the specific model in front of you, since column counts and supported features vary between printers. You can do that yourself, or send the HTML to a service that renders per model and prints it. Receiptful takes the second approach: you POST the HTML, it renders for your printer and prints, and the first 20 receipts each month are free.
Either way, the design rules above are the same. The paper is narrow and the ink is one color, and a receipt that respects that is one people can actually read.