
Build a POS receipt printer in Node.js
A small, real Express service that turns an order into a printed receipt. Model the order, render it as HTML, POST it, and confirm it printed. Copy-paste and go.
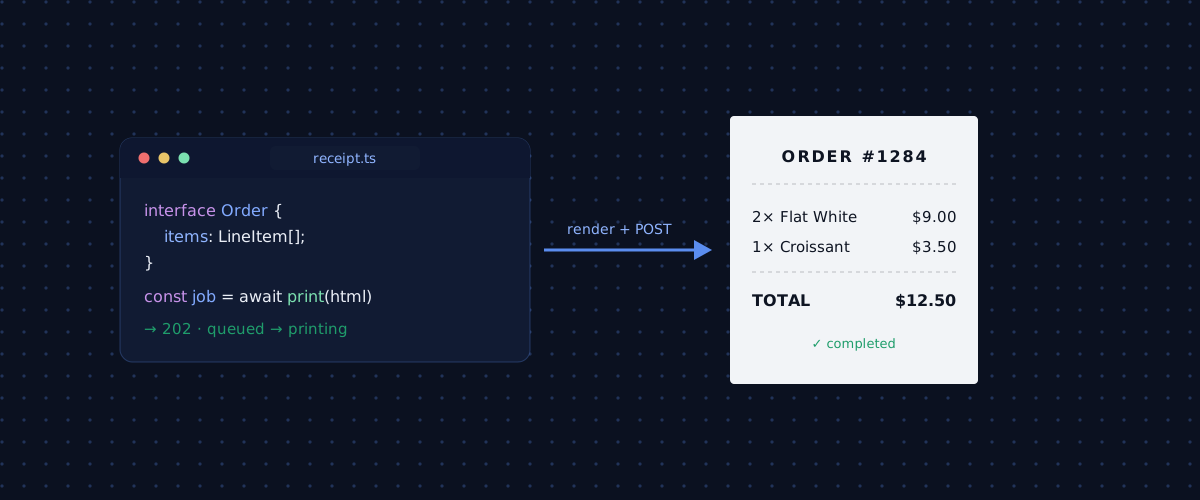
You have orders coming into your point of sale, and you want each one to print on the thermal printer at the counter. This is a complete walkthrough of a small Node service that does exactly that. By the end you will have an endpoint you can POST an order to and watch paper come out.
There is nothing to install next to the printer for this tutorial to work, and no ESC/POS to write by hand. You send HTML, Receiptful prints it.
Before you start
You need two things from the console:
- A paired printer, which gives you a printer ID. If you have not done this yet, the getting started guide walks through it in a couple of minutes.
- An API key (the
rf_live_…value), created under API keys and shown only once.
On the code side you need Node 18 or newer, so that fetch is available globally with no extra dependency. We will use TypeScript, but the same code works in plain JavaScript if you drop the types.
Put your credentials in the environment rather than in the source:
export RECEIPTFUL_API_KEY="rf_live_3f9c…"
export RECEIPTFUL_PRINTER_ID="42"
Step 1: model the order
Start with the shape of an order. Yours will have more fields, but this is enough to print a useful receipt:
interface LineItem {
  name: string;
  quantity: number;
  unitPrice: number; // in cents, to avoid float rounding
}

interface Order {
  id: number;
  items: LineItem[];
  placedAt: Date;
}
Keeping money in cents and formatting only at the edges saves you from the classic floating point rounding bugs that show up as a receipt total that is one cent off.
Step 2: render the order as HTML
This is the part that decides how the receipt looks. Receiptful converts the HTML you send into ESC/POS for your specific printer, so you get to lay a receipt out with tags you already know instead of byte codes.
function money(cents: number): string {
  return "$" + (cents / 100).toFixed(2);
}

function renderReceipt(order: Order): string {
  const lines = order.items
    .map((item) => {
      const total = money(item.unitPrice * item.quantity);
      return `<tr><td>${item.quantity}x ${item.name}</td><td align="right">${total}</td></tr>`;
    })
    .join("");

  const grandTotal = money(
    order.items.reduce((sum, i) => sum + i.unitPrice * i.quantity, 0),
  );

  return `
    <h1 style="text-align:center">CAFE MILA</h1>
    <p style="text-align:center">Order #${order.id}</p>
    <hr>
    <table width="100%">${lines}</table>
    <hr>
    <table width="100%">
      <tr><td><b>TOTAL</b></td><td align="right"><b>${grandTotal}</b></td></tr>
    </table>
    <p style="text-align:center">Thank you</p>
  `;
}
Receipt paper is narrow, so keep the layout to a single column and let text wrap. There is more to say about designing for a 58mm roll, and a follow-up post covers it, but this is enough to print something clean.
Step 3: send it to the printer
Now POST the HTML to the printer's job endpoint. One authenticated request creates the job:
const API = "https://api.receiptful.io/v1";
const KEY = process.env.RECEIPTFUL_API_KEY!;
const PRINTER = process.env.RECEIPTFUL_PRINTER_ID!;

async function printReceipt(order: Order): Promise<number> {
  const res = await fetch(`${API}/printers/${PRINTER}/jobs`, {
    method: "POST",
    headers: {
      Authorization: `Bearer ${KEY}`,
      "Content-Type": "text/html",
    },
    body: renderReceipt(order),
  });

  if (!res.ok) {
    const detail = await res.text();
    throw new Error(`Print request failed (${res.status}): ${detail}`);
  }

  const job = await res.json();
  return job.id as number;
}
The response is the job that was created, and a second or so later the receipt prints:
{
  "id": 9281,
  "printer_id": 42,
  "status": "queued",
  "lifetime_seconds": 600,
  "created_at": "2026-07-16T10:24:01Z",
  "expires_at": "2026-07-16T10:34:01Z",
  "status_updated_at": "2026-07-16T10:24:01Z"
}
Step 4: wrap it in an endpoint
Put that behind a route so your checkout can call it. Here it is with Express:
import express from "express";

const app = express();
app.use(express.json());

app.post("/orders/:id/print", async (req, res) => {
  try {
    const order: Order = req.body;
    const jobId = await printReceipt(order);
    res.status(202).json({ jobId });
  } catch (err) {
    console.error(err);
    res.status(502).json({ error: "Could not queue receipt" });
  }
});

app.listen(3000);
Returning 202 Accepted is deliberate. The job is queued, not yet confirmed printed, and that distinction matters at a busy counter. The next step is how you close that gap.
Step 5: confirm it actually printed
A receipt endpoint that returns success the moment the request is accepted will happily report a print that never reached paper, because the printer was off or out of range. If it matters that the receipt printed, poll the job until it reaches a final state:
async function waitForPrint(jobId: number, timeoutMs = 15000): Promise<string> {
  const deadline = Date.now() + timeoutMs;

  while (Date.now() < deadline) {
    const res = await fetch(`${API}/printers/${PRINTER}/jobs/${jobId}`, {
      headers: { Authorization: `Bearer ${KEY}` },
    });
    const job = await res.json();

    if (["printed", "failed", "expired"].includes(job.status)) {
      return job.status;
    }
    await new Promise((r) => setTimeout(r, 1000));
  }
  return "timeout";
}
A job moves through queued, notification_sent, notification_received, printing, and then printed. If the printer never answers, the job expired instead of printing a stale order, which is exactly what you want at closing time. How you react to failed or expired, whether that means a retry, an on-screen alert, or a reprint button for staff, depends on your counter, so it is worth deciding on purpose rather than by default.
That is the whole thing
Roughly sixty lines and you have order to paper, with a real status check rather than a hopeful fire and forget. No print server, no drivers, no ESC/POS.
The first 20 receipts each month are free, no card required, so you can build this against a real printer today.
Open the console to grab a printer ID and key, or read the API docs for every field.